
What This Article Covers
This guide is for architects, engineers, inspectors, fire safety consultants, and facility managers who need to confirm that the toilet fixtures actually installed in a completed or near-completed building match the design intent, the permitted drawings, and the adopted plumbing code. It assumes you can access the permitted drawing set, the plumbing fixture schedule, and the adopted edition of the International Plumbing Code (IPC) or your jurisdiction’s equivalent.
If you are still in the design phase and need to calculate the fixture count from occupant load, start with our office toilet fixture count workflow, which establishes the numbers this article verifies. This article is the field counterpart: what to check, in what order, and what evidence to collect so the verification holds up if it is later challenged.
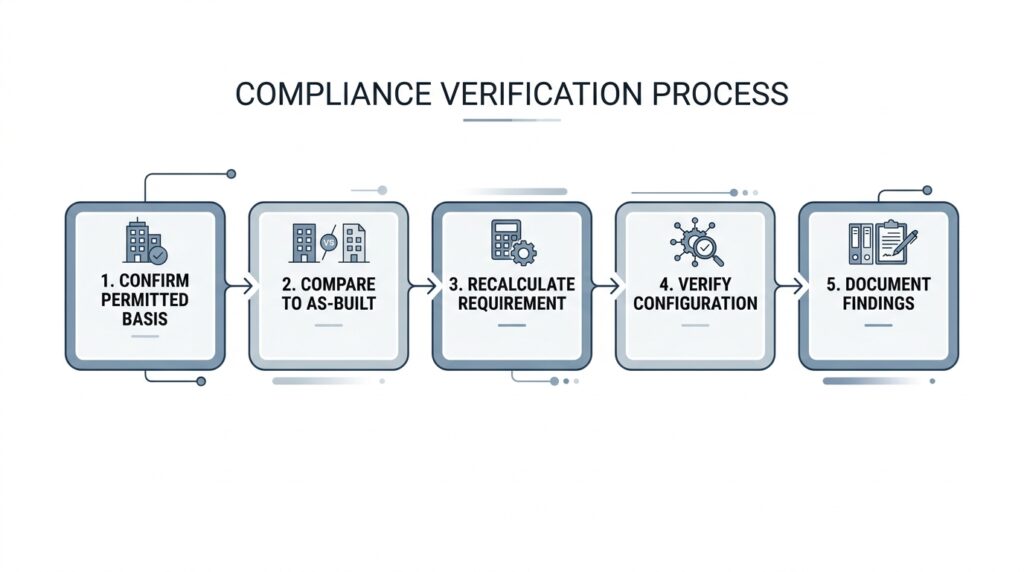
By the end, you will have a six-step verification method, a worked recalculation example, a field checklist, and a list of the mistakes that most often undermine a fixture inspection.
Why Fixture Verification Is More Than Counting Toilets
The naive approach is to walk into each restroom, count the fixtures, and compare the total to the plumbing schedule. That approach misses most of the issues that matter.
The real question is: does the installed fixture count satisfy the code requirement for the actual occupant load of the actual occupied spaces, given the actual fixture types and configuration? Four things can drift independently between design and handover:
- Occupant load. A tenant fit-out converted storage into a conference room, a floor was re-planned, or a mezzanine was added after permit.
- Use classification. A space drawn as Business was built out as Assembly, and the plumbing ratios are different.
- Fixture types. Urinals were value-engineered in or out, accessible compartments were reduced, or lavatory counts were cut.
- Configuration. The fixtures exist, but accessibility clearances are wrong or the male/female split no longer matches the calculation assumption.
A sound verification workflow checks all four, in order.
From the field: On mid-rise office and mixed-use projects we have handled through Doha Municipality and Qatar Civil Defense, fixture-count problems found at inspection were rarely on the open office floor plate. They usually involved spaces that had crossed a threshold during construction: a training room that became Assembly, a mezzanine added late, or a back-of-house area reclassified without updating the plumbing drawings. Verifying against the current floor plan, not only the permitted set, was often the difference between a clean handover and a re-inspection.

Before You Start: Confirm the Governing Code
Fixture ratios, urinal substitution limits, and accessibility rules change between code editions and are frequently amended locally. Before any site work, confirm:
- The code and edition adopted by the authority having jurisdiction (for example, a specific edition of the IPC and IBC in a U.S. jurisdiction, the National Plumbing Code of the Philippines, or the applicable Qatar or other national standards).
- Any local amendments to fixture ratios, separate-facility rules, or required public facilities.
- The accessibility standard that applies (for example, the ADA Standards and ICC A117.1 in the United States, or the local equivalent).
- The edition in force on the permit date, since many jurisdictions verify against the code that applied at permit, not the latest edition.
The ratios and examples in this article use the IPC as a reference. Always confirm numbers against the table in your adopted edition.
Step 1: Verify the Occupant Load Basis on the Permitted Drawings
Start with paper, not the field. Before walking the building, confirm how the permitted drawings calculated occupant load for each space served by the restrooms you will inspect.
- Locate the plumbing fixture schedule. It should show, for each restroom group, the calculated occupant load, the ratio applied, and the resulting minimum fixture count.
- Locate the life safety plan or code analysis. It should show the occupant load space by space, including use group and area basis.
- Confirm consistency. The occupant load driving the fixture schedule should match the one driving egress. If they disagree, one of them is wrong, and both matter.
The most common documentation deficiency here is a plumbing schedule that shows only the final fixture count, without the underlying occupant load and ratio. Without that trail, a reviewer can confirm the count is present but not that it is correct. For post-construction verification, the absence of a documented basis is itself a deficiency because it prevents verification.
This is the same standard our occupant load calculation workflow recommends at design stage. This step simply checks that it was followed.
Step 2: Compare Permitted Drawings to As-Built Conditions
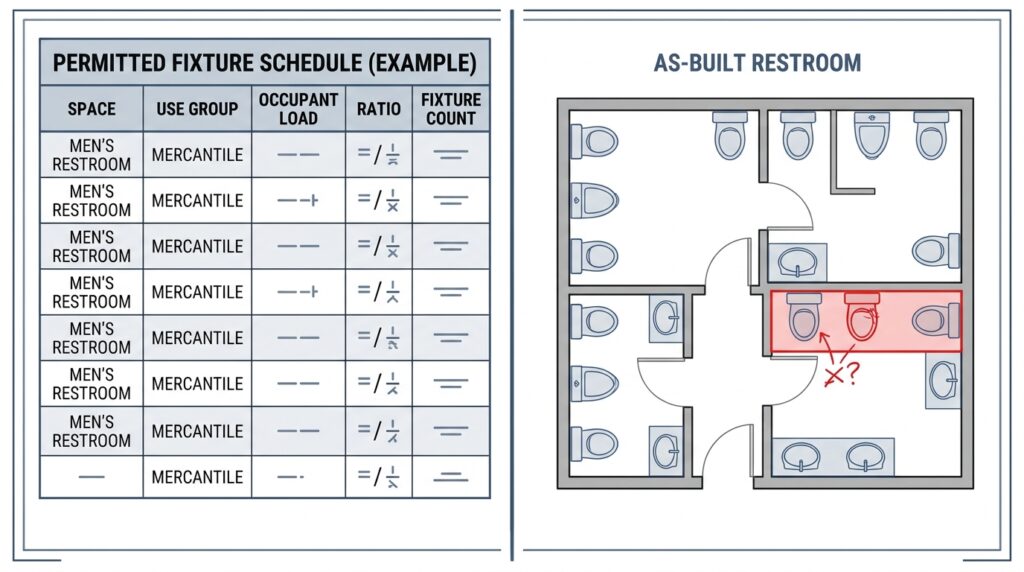
With the paper basis confirmed, compare the drawings to what was built. This step catches drift introduced during construction administration, tenant fit-out, or value engineering.
| Item to compare | Why it matters |
|---|---|
| Use group of each served space | A Business space built out as Assembly changes the required ratio |
| Floor area of each served space | Area growth can push a space past a ratio threshold |
| Fixture types (water closet, urinal, lavatory) | Substitutions change the effective count |
| Fixture count per restroom | Direct check against the schedule |
| Male/female distribution | Ratios assume a split; confirm the assumption still holds |
| Location and travel distance | Many codes limit how far occupants may travel to reach facilities |
A practical method is to walk each floor with the permitted plumbing plan, red-line any differences on the spot, photograph discrepancies, and record them in the inspection log. Do not rely on memory; fixture counts are easy to miscount across a multi-floor building.
Where the drawings and as-built condition diverge significantly, which is common after tenant fit-out, do the comparison floor by floor. The as-built condition then becomes the new baseline for the recalculation in Step 3.
Step 3: Recalculate the Required Fixture Count From the As-Built Condition
This is the step most inspection checklists skip, and it is where many real deficiencies are found. The question is not “does the as-built count match the permitted count?” but “does the as-built count satisfy the code for the as-built occupant load?”
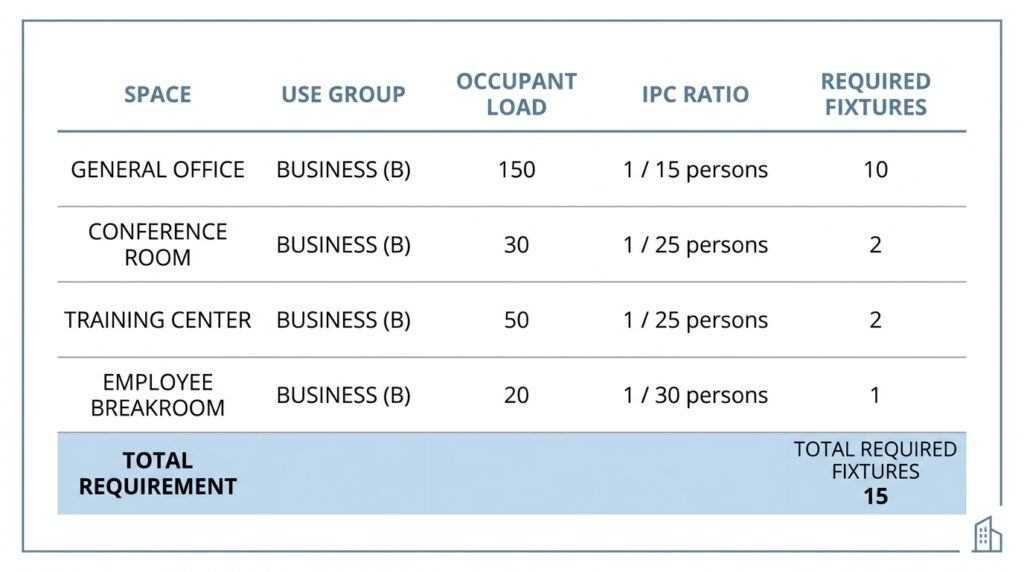
The recalculation follows the original design method, using as-built areas and use groups:
- Recalculate occupant load for each served space from the as-built use group and area. If the as-built condition is not documented, use measured areas and observed use.
- Determine the male/female split. Many codes assume an even split unless the design justifies another. Confirm which assumption was used.
- Apply the correct ratio for each use group and fixture type: water closets, urinals, lavatories, drinking fountains, and service sinks.
- Round up any fraction. A requirement of 2.1 water closets is 3.
- Compare to installed fixtures, type by type and sex by sex. Installed count must meet or exceed the requirement.
Worked Example (Illustrative)
This example uses IPC-style Business ratios of one water closet per 25 occupants for the first 50 and one per 50 thereafter, and one lavatory per 40 for the first 80 and one per 80 thereafter. Confirm against your adopted edition before relying on these figures.
| Permitted basis | As-built condition | |
|---|---|---|
| Occupant load served | 100 | 120 (storage converted to meeting room) |
| Assumed split | 50 male / 50 female | 60 male / 60 female |
| Water closets required per sex | 2 | 3 (2 for the first 50, plus 1 for the 10 remaining, rounded up) |
| Lavatories required per sex | 2 | 2 (60 ÷ 40 = 1.5, rounded up) |
| Water closets installed per sex | 2 | 2 |
| Result | Compliant on paper | One water closet short per sex |
The permitted drawing and the installed count agree, yet the as-built building is non-compliant. A simple count would have missed it.
If the installed count is below the requirement, this is a genuine non-compliance, not a paperwork issue. It belongs in the inspection report as a deficiency requiring rectification.
Try it yourself: Fixture Verification Calculator. Enter the as-built occupant load and the installed fixture counts to compare them against IPC-style Business ratios. It is a screening aid for Business occupancy only; confirm the ratios, urinal cap, and use group against your adopted code edition.
Open the calculator in a full page
Step 4: Verify Fixture Configuration, Accessibility, and Function
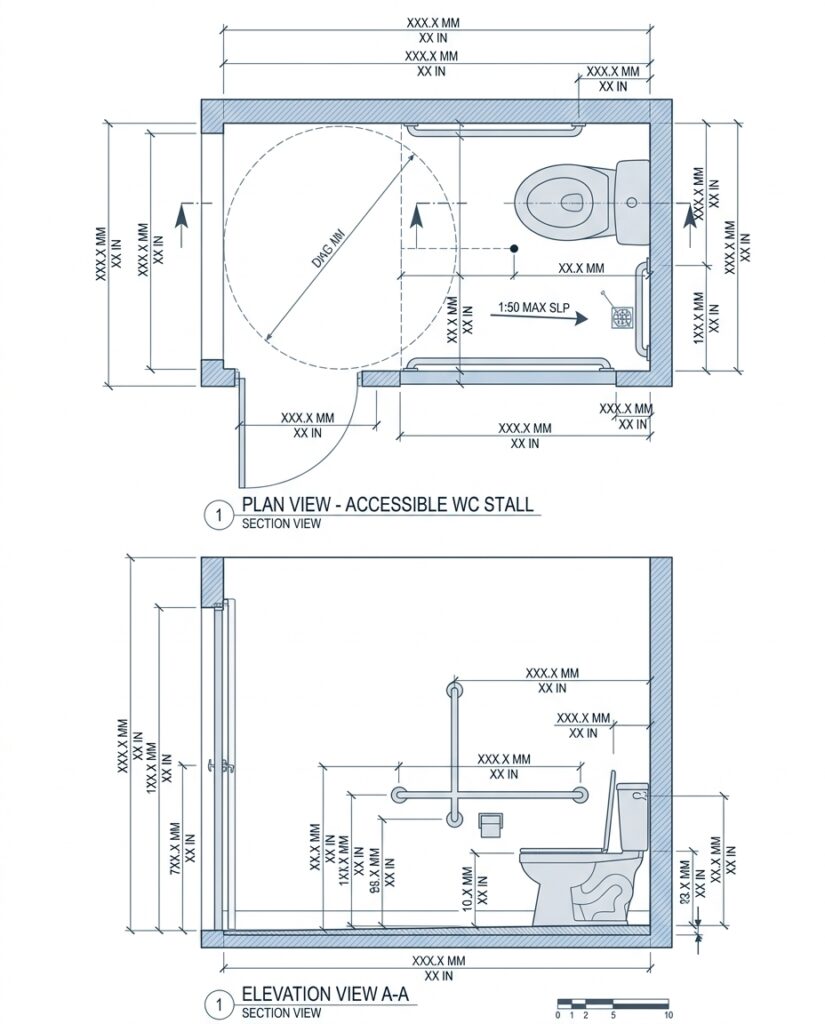
A fixture that exists but cannot be used by all occupants is not a compliant fixture. This step checks the physical installation, not just the count.
Accessible water closet compartments
For each accessible compartment, verify against your adopted accessibility standard:
- Clear floor space and turning space.
- Water closet centerline distance from the side wall and the seat height.
- Grab bar locations, lengths, and mounting heights, and that bars are firmly anchored.
- Door swing, which should not intrude into the required clear floor space, and door hardware that is operable without tight grasping.
- Flush control location and operability.
- Mounting height of toilet paper dispensers, coat hooks, and other accessories.
These are the items inspection reports most often flag on completed buildings because they are easy to install slightly wrong and hard to correct once tile and partitions are set.
Required accessible fixtures
Counting accessible fixtures is a separate check. Depending on the standard, confirm:
- An accessible compartment is provided in each multi-user room, where required.
- An ambulatory accessible compartment is provided where the number of compartments exceeds the threshold in your standard (commonly six or more water closets and urinals combined).
- At least one accessible urinal is provided where urinals are installed, where required.
- Where only a single-user room is required, that room is itself accessible.
- Any all-gender, family, or assisted-use room required or relied upon in the calculation is configured and signed correctly.
Lavatories and accessories
- At least one lavatory per room provides the required knee and toe clearance and clear floor space, with exposed hot-water and drain pipes insulated or otherwise protected.
- Faucet controls are operable without tight grasping or twisting.
- Mirrors, dispensers, and hand dryers are within the permitted reach ranges and do not protrude into circulation or clearances.
Urinal substitution limits
If urinals were used to reduce the water closet count, verify the substitution stayed within the permitted limit. The cap varies by code edition and occupancy; some editions require that water closets not be reduced below roughly two-thirds of the minimum number, while others use a lower limit for certain uses. Confirm the figure in your adopted edition.
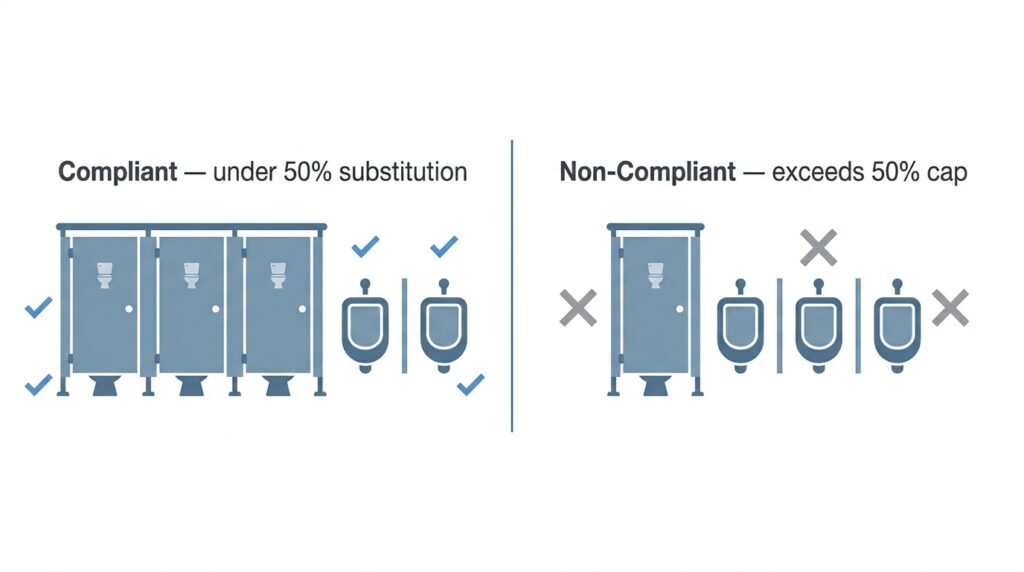
As an illustration, if a men’s room requires three water closets and the cap allows reducing to no fewer than two, then one water closet plus three urinals is non-compliant even though four fixtures are present.
Signage and wayfinding
Confirm that required room-identification and accessible signage is present, mounted at the correct height and location, and includes tactile and braille characters where required. Also confirm directional signage to facilities where they are not visible from the main circulation route.
Functional and performance checks
A fixture that is counted but not working does not meet the intent of the code. During the walkthrough, operate every fixture:
- Flush each water closet and urinal, and check for leaks, running cisterns, and slow drainage.
- Run each lavatory and check water flow, drainage, and hot/cold supply.
- Confirm exhaust ventilation is operating in each restroom.
- Check that floor drains, traps, and visible venting are installed as designed.
- Where specified, check that fixtures match the water-efficiency ratings shown on the submittals.
Technical plumbing tests (pressure, drainage, and venting) are normally witnessed by the plumbing inspector. Your role is to record that they were completed and filed, not to repeat them.
Step 5: Verify Required Public Facilities and Special Cases
Before closing the verification, check the situations that commonly make a correct-looking count wrong.
- Separate facilities by sex. Many codes allow a single unisex room for small occupant loads and require separate rooms above a threshold. Confirm the exception was applied correctly.
- Customer and employee facilities. In mercantile and similar uses, the code may require facilities available to the public in addition to employee facilities. Confirm which were counted.
- Shared or multi-tenant facilities. Where tenants share restrooms, confirm the code permits sharing, that travel distance and floor-level limits are met, and that the combined occupant load of every tenant using the facility is accounted for.
- Travel distance and floor level. Some codes limit the distance to the nearest facility and require facilities on the same floor or within one story of the occupant.
- Mixed-use buildings. Calculate each use group separately unless the code allows combined treatment.
- Phased occupancy. If the building opens in phases, verify fixtures are adequate for each phase’s occupant load, not just the final one.
- Regional fixtures. Features such as bidet sprayers or ablution facilities may be expected locally. Confirm whether they count toward the code requirement or are in addition to it.
Step 6: Document the Verification So It Survives Review
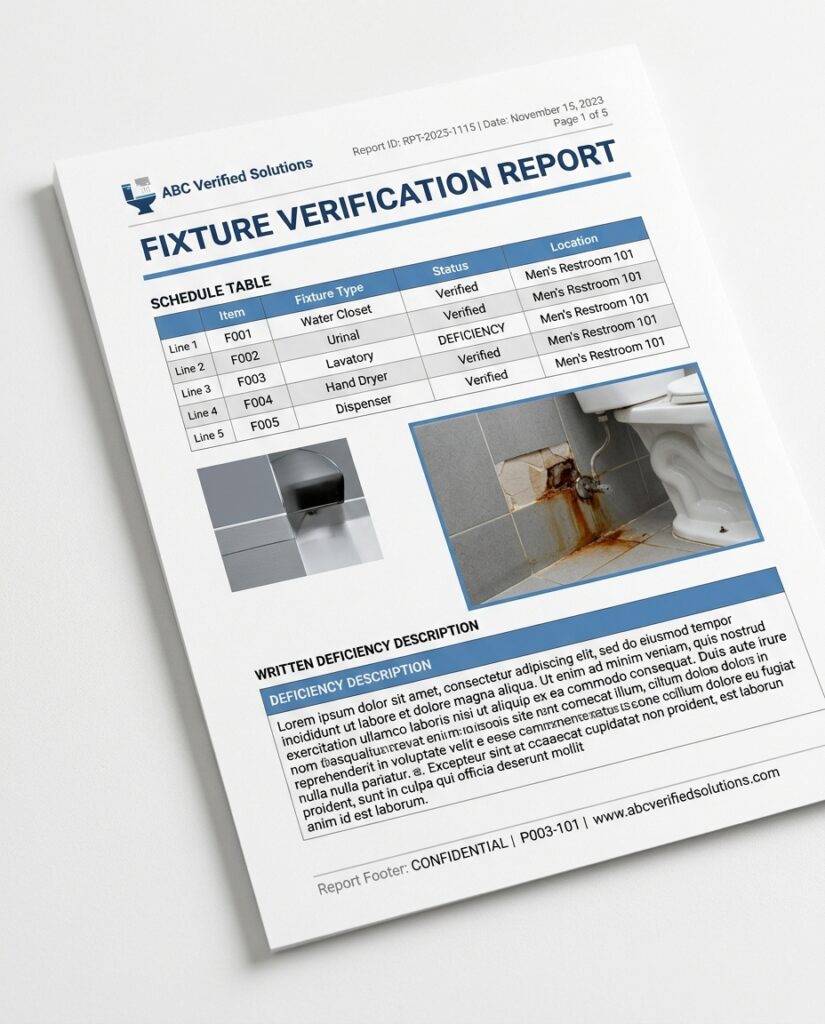
A finding is only as strong as the record behind it. A report that says “fixture counts confirmed” without evidence will not hold up if challenged by a contractor, tenant, or authority.
A defensible record includes:
- The permitted basis: the plumbing fixture schedule, with the occupant load and ratio that produced each count.
- The as-built condition: measured floor areas, observed use groups, and photographed fixture counts per floor and per restroom.
- The recalculation, shown space by space.
- The comparison: each deficiency identified by fixture type and sex, with the specific code section it fails.
- Photographic evidence for any configuration or accessibility deficiency, including a tape measure in frame where useful.
- Date, inspector name, and code edition used for the verification.
Our inspection report writing guide describes the same documentation standard across inspection types.
Field Checklist
Use this as a quick reference on site.
| Check | Done |
|---|---|
| Governing code edition and local amendments confirmed | ☐ |
| Fixture schedule shows occupant load and ratio | ☐ |
| Fixture schedule occupant load matches life safety plan | ☐ |
| As-built use group and area verified for each served space | ☐ |
| Required count recalculated from as-built conditions | ☐ |
| Installed count compared by fixture type and by sex | ☐ |
| Urinal substitution within permitted limit | ☐ |
| Accessible compartments, ambulatory compartment, and accessible urinal verified where required | ☐ |
| Clearances, grab bars, and door swing measured | ☐ |
| Lavatory knee clearance and pipe protection verified | ☐ |
| Drinking fountains and service sink counts verified | ☐ |
| Signage verified | ☐ |
| Every fixture flushed or run; exhaust operating | ☐ |
| Photographs and measurements recorded | ☐ |
Common Mistakes That Undermine Verification
- Counting fixtures without checking occupant load. A restroom with the permitted number of fixtures is non-compliant if the served spaces now hold more occupants than assumed.
- Verifying against the permitted drawings only. After a fit-out or change of use, the permit set is no longer the relevant baseline.
- Treating a documentation gap as a pass. A missing fixture schedule is an unverifiable condition and should be flagged.
- Missing the urinal substitution cap. It is a hard limit and is often exceeded in value-engineered restrooms.
- Skipping accessibility because the count matches. Count and configuration are independent checks. Both must pass.
- Not verifying by sex. A matching total can still fail if the distribution does not meet the ratio for each sex.
- Ignoring lavatories, drinking fountains, and service sinks. Water closets get the attention, but the other fixtures are in the same table.
- Using the wrong code edition. Ratios and caps change between editions.
What to Do When You Find a Deficiency
A fixture shortfall is rarely fixed by the inspector alone. Typical resolution routes include:
- Add fixtures, which is often costly once finishes are complete.
- Reduce the occupant load served by the restroom through a revised layout, posted capacity, or change of use, where the authority accepts it.
- Provide additional or shared facilities on the same or an adjacent floor, where allowed.
- Request a modification or alternative-method approval from the authority having jurisdiction with supporting justification.
Whichever route is taken, record the decision, who approved it, and the date. See From Inspection to Rectification: Tracking and Closing Deficiencies for how to manage this after the finding is issued.
Frequently Asked Questions
Do I verify against the permitted drawings or the as-built condition? Both. Use the permitted drawings to understand the design basis and identify drift, but the compliance question is answered against the as-built condition and current use.
Is a matching fixture count enough to pass? No. The count must satisfy the code for the actual occupant load, by fixture type and by sex, and the fixtures must also meet accessibility and function requirements.
What if the project has no fixture schedule? The condition is unverifiable until a basis is established. Reconstruct the occupant load and ratio from the as-built condition, document the assumptions, and flag the missing schedule as a documentation deficiency.
Do urinals count toward the water closet requirement? In many codes they can partly substitute, but only up to a cap that varies by edition and occupancy. Check your adopted edition.
Who is responsible for fixture verification? This depends on the contract and the jurisdiction. It is commonly shared between the design team during construction administration, the contractor’s quality program, and the authority’s final inspection.
Does a change of tenant require re-verification? Often yes. A change in occupant load or use group can change the required fixtures, and many jurisdictions require a permit or review for it.
Key Takeaways
The workflow is: confirm the governing code, confirm the permitted basis, compare to as-built, recalculate from as-built, verify configuration, accessibility, and function, check special cases, and document everything. Skipping a step turns verification into a count of toilets that does not answer the compliance question. The goal is a defensible record that the building as built satisfies the code for the building as used, protecting the owner at handover, the architect at the end of construction administration, and the facility manager when a future tenant requests a change of use.
Related Reading on ArchFieldGuide
- How Many Toilets Does an Office Building Need? Occupant Load to Fixture Count: the design-stage calculation this verification checks.
- How to Calculate Occupant Load: Floor Area, Use Group, and Code Tables: the upstream calculation that drives every fixture count.
- How to Verify Occupant Load Post-Construction: Layout and Use Changes: the occupant load verification that should precede fixture verification.
- How to Inspect Accessible Routes in a Completed Building: the broader accessibility verification that includes restroom stops.
- Inspection Report Writing: How to Document Deficiencies Clearly: the documentation standard for defensible findings.
- From Inspection to Rectification: Tracking and Closing Deficiencies: what happens after a deficiency is identified.
Disclaimer
This article is general educational guidance and does not replace the adopted codes, local amendments, or the requirements of the authority having jurisdiction. Code provisions, ratios, and accessibility dimensions vary by edition and jurisdiction. Always verify against the official documents in force for your project and consult a licensed professional where required.
About This Guide
This article is part of the ArchFieldGuide reference library, a practical, workflow-based resource connecting design decisions, utility sizing rules of thumb, and on-site verification for architects, engineers, and fire safety consultants.
The verification workflow described here reflects more than 20 years of architectural practice across commercial, hospitality, institutional, healthcare, and residential projects in Qatar, the Philippines, and internationally, including Doha Municipality and Qatar Civil Defense (QCD) submissions and inspections for office buildings, hotels, malls, schools, clinics, and mixed-use developments.
To see the project portfolio behind this reference, visit the ArchFieldGuide project portfolio.